Creating a polished and organized look for Google Slides presentations often leaves producers scratching their heads. In a presentation, it is undoubtedly crucial, yet quite difficult to strike a balance between creating attractive visuals and highlighting key content to enhance readability, while showing the author's professionalism and rigor.
Using hanging indent is one of the effective ways to enhance the readability and aesthetics of text. It clarifies the hierarchy of your text while making the main points in your text stand out, effectively avoiding clutter and visual distractions. If you haven't mastered it yet, then here are detailed tips on how to do hanging indent on Google Slides. Of course, there are more powerful ways to help you create beautiful and functional slideshow.
- On This Page
- What is a Hanging Indent?
- Step-by-Step Guide on How to Do Hanging Indent on Google Slides
- Break the Blandness: Enhance Visual Hierarchy with AI PowerPoint Generator
What is a Hanging Indent?
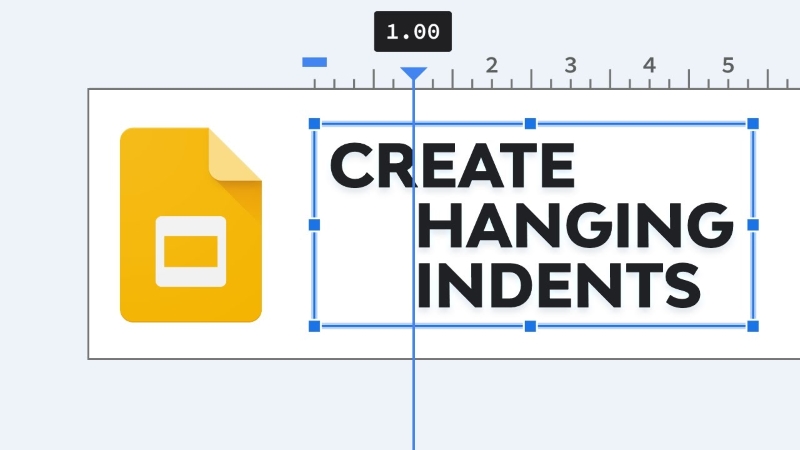
Before we delve into the how - to, let's quickly review what a hanging indent is. A hanging indent is a type of text formatting where the first line of a paragraph or list item is left - aligned, while the subsequent lines are indented to the right.
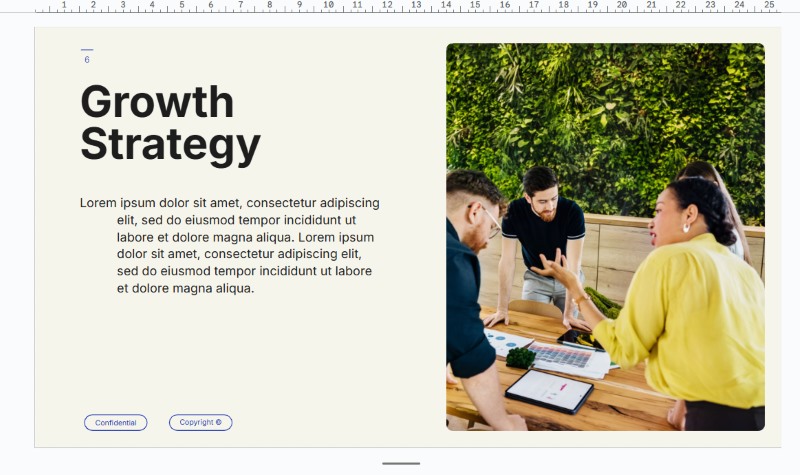
In this way, a visual hierarchy can be created within a paragraph, making it easier for the viewer to distinguish between different parts of the text and follow the information flow. This is more common when citing references in academic papers and professional reports, where hanging indent bibliography makes the list of references clearer and easier to read. Of course, hanging indentation can also be used when creating bulleted or numbered lists, or when laying out long paragraphs of text, thus enhancing the readability, aesthetics, and hierarchy of the text.
Step-by-Step Guide on How to Do Hanging Indent on Google Slides
Wondering how to do a hanging indent on Google Slides, here are three ways to do it. They are all easy to follow and you can choose the right method for your situation. Now, open your Google Slides file and get ready to get started:
Method 1: Drag the Ruler Slider for Hanging Indent Google Slides
This is the easiest and most intuitive solution to how to do hanging indent on Google Slides. You just need to drag the ruler's slider to see the indent scale directly, which is easy to adjust in real time.
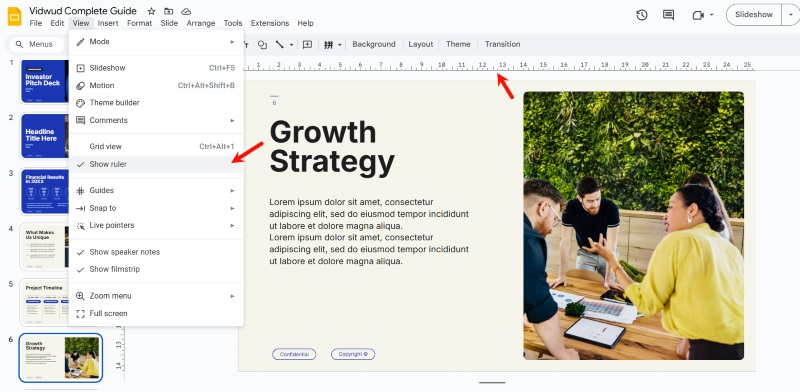
Step 1: Google Slides provides a ruler at the top and left side of each slide for text alignment. It is shown by default, if you don't see it in the page, please go to View > Show ruler and tick it.
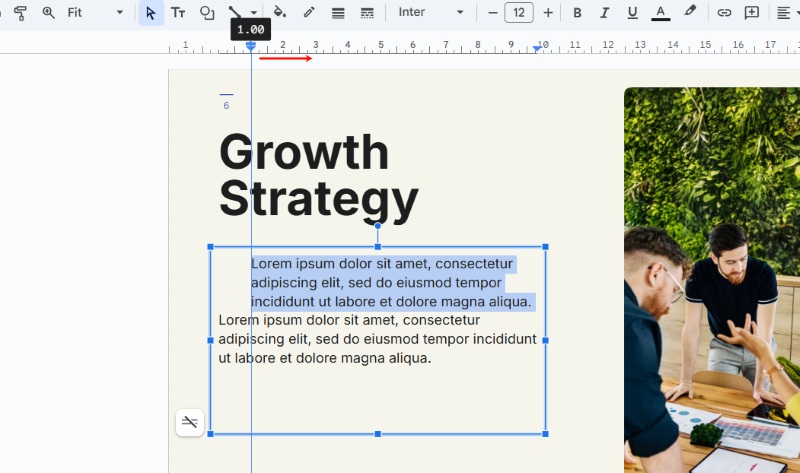
Step 2: Select the text you want to create hanging indent, then find the slider above it. The slider consists of two parts, the Left Indent and the First Line Indent.

Pull the Left Indent slider to the right until you need to indent the position, at this time, the whole paragraph will be indented to the right.
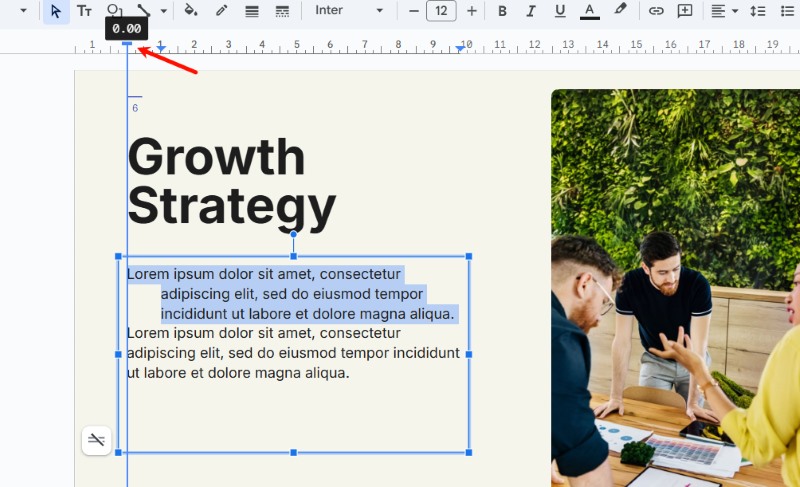
Step 3: Pull the First Line Indent slider back to the starting position, the text can realize the effect of hanging indent.
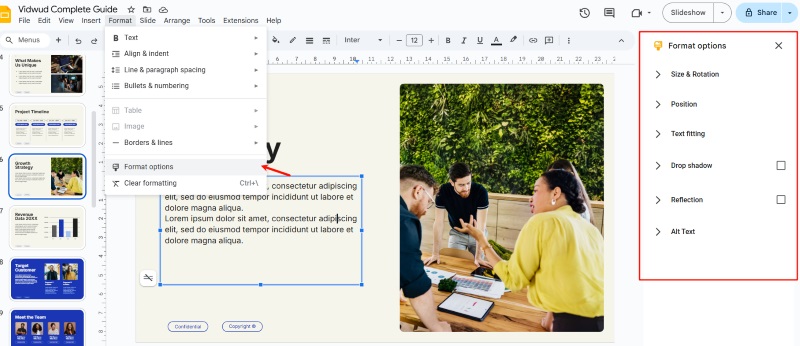
Method 2: Use Format Options for Hanging Indent
If you already know the value of the indentation, then you can use Format options to quickly complete the operation of creating a hanging indentation format.
Step 1: Locate Format, or just right click on the text, find Format options and click on it. Then a sidebar will pop up, you can complete the formatting here.
Step 2: Select the text and choose Text fitting option in the right sidebar. Under Indentation > Special, select Hanging.
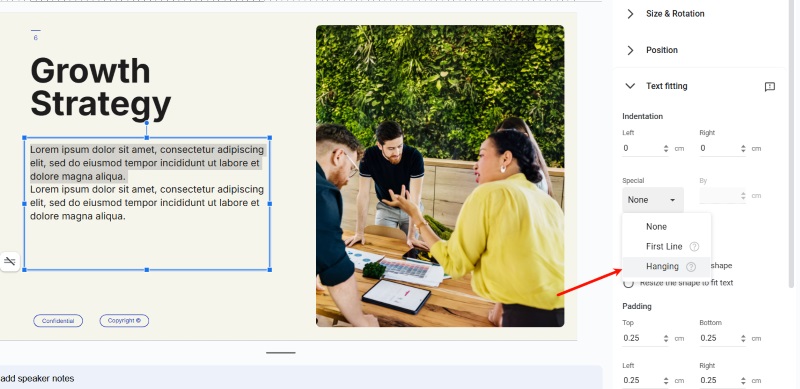
Step 3: Then, enter a specific value in the text box corresponding to By to adjust the indentation.

Method 3: Create Hanging Indent in Google Slides with Shortcut
Of course, you can also use some keyboard keys to quickly achieve a simple hanging indent effect.
Step 1: Place the cursor at the beginning of the line of text you want to indent and press Shift+Enter. This will place the text on a separate line and indent it further.

Step 2: Press Tab to add indentation to the selected line.
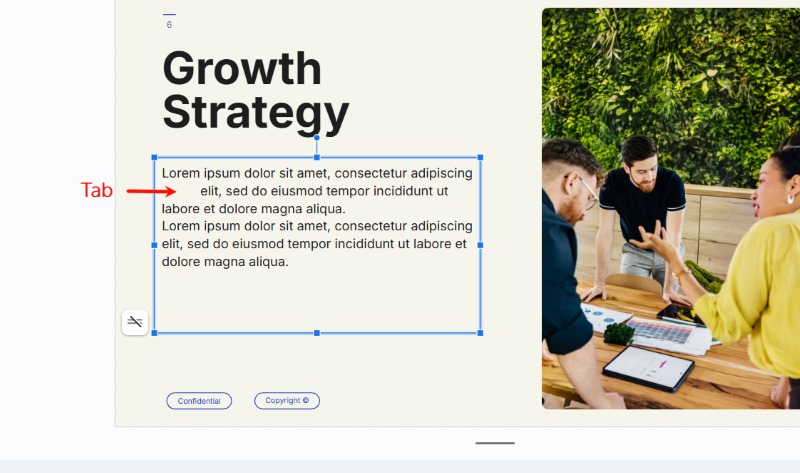
You can repeat this process so that you can use the hanging indent shortcut to add indentation to each line, and finally realize the hanging indent effect.
Break the Blandness: Enhance Visual Hierarchy with AI PowerPoint Generator
When creating slideshows, how to make the content visually stand out and hierarchical is always the core demand of creators. Whether it's presenting academic data, a business proposal, or sharing creative inspiration, text that lacks visual hierarchy often leaves viewers in a mess of information, making it difficult to quickly grab the point. Creating hanging indentations is an effective way to enhance hierarchy and readability, however, with the rapid advancement of AI, this does not bring enough visual appeal.
Free AI Presentation Maker - Text to PPT
-
Easy and free prompt-to-slideshow generator
-
Multiple themes & templates for beautiful PPT creation
- Perfect online slideshow for school project, business pitch, etc.
Make AI Presentation Now
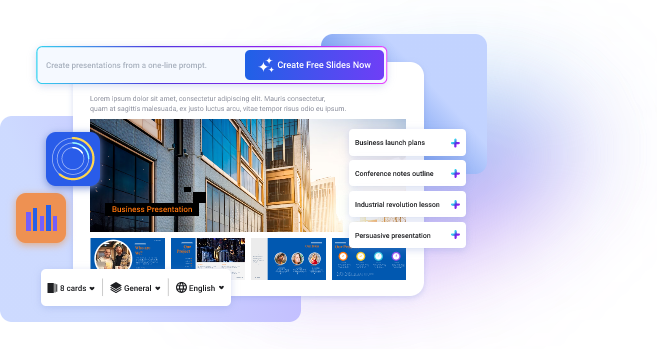
At this point, Vidwud AI PowerPoint Generator will be your perfect choice. It can quickly generate slides with professional visual effects for users, using AI technology to automatically optimize the text layout and make the slide content hierarchical, which greatly improves the visual attraction. Moreover, as an online tool that requires no installation, users can access and use it anytime and anywhere as long as they have a browser, free from the limitations of operating devices and software installation, making slide show production easy and convenient.
Key Feature
-
Intelligent Visual Optimization: Vidwud AI PowerPoint Generator employs advanced algorithms to automatically typeset text and elements to create layered layout effects. Without the need for manual adjustments, the slides can be clearly prioritized and the overall visual hierarchy can be enhanced, making it easier for the audience to understand and receive the information.
-
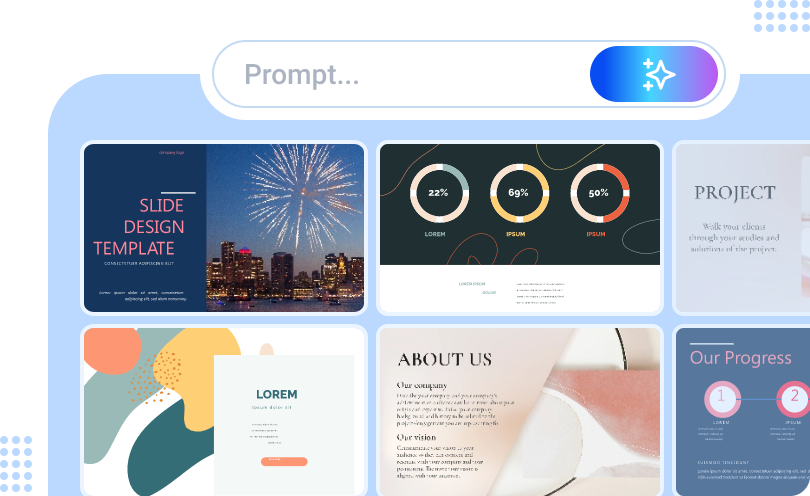
Massive Templates with Quality Layout: Vidwud offers thousands of fully customizable templates, each of which has been carefully designed, whether for business, education or event-related topics. The templates highlight important content through color matching, element layout and other techniques, making the slideshow visually appealing from the overall style.
- Instant Generation for Effectiveness: Compared with traditional production methods, Vidwud greatly saves time and effort in collecting materials and designing layouts. Users only need to input prompts and select basic options, and then they can get a complete slideshow in 1 - 2 minutes, and the effect of the output is not inferior.
- Flexible Editing Functions: The Built-in editing tool makes it easy for users to personalize the AI-generated slideshow. Users can adjust text, images and other elements according to actual needs, and also add hanging indentation to further optimize the visual hierarchy.
Conclusion
Understanding how to do hanging indent on Google Slides can effectively improve the presentation of your content. This simple yet powerful method can dramatically improve the hierarchy of your slides. Keep these tips in mind! Certainly, if you want to create a more visually appealing slideshow, take the plunge and try Vidwud to keep your audience's eyes focused on you!
Free AI Presentation Maker - Text to PPT
-
Easy and free prompt-to-slideshow generator
-
Multiple themes & templates for beautiful PPT creation
- Perfect online slideshow for school project, business pitch, etc.
Make AI Presentation Now


![Best 5 Online AI PowerPoint Generator from Text [2025]](https://cdn.vidwud.com/blog_files/20250114/best-online-ai-powerpoint-generator-from-text.png)


